Getting Started with LoRa Conduit AEP (LoRa Configuration)
This section only applies to devices with mPower™ and LoRa. For the Conduit®, LoRa cards are typically sold separately.
https://www.youtube.com/watch?v=Q_25lZWcSWI&t=6s
Before setting up LoRa, your device should be connected and powered up. If not refer to installation information for your device.
- For Conduit installation, see the Conduit Quick Start Guide.
- For Conduit Access Point installation, refer to the Quick Starts or User Guides available through Conduit AP
- For Conduit IP67 Base Station, refer to the Installation Guide for your model, available through Conduit IP67 Base Station
Getting Started with LoRa
- Login to the web management interface. Refer to the software guide if needed.
- Access the LoRaWAN Network Settings by going to LoRaWAN > Network Settings on the left sidebar. See LoRaWAN Network Settings in the software guide for details.
- To modify advanced settings, click Show Advanced Settings. For more details, see LoRaWAN Network Settings in the software guide.
- For configuring as a Packet Forwarder, select Packet Forwarder from Mode under LoRa Mode. For more details, see LoRaWAN Network Settings in the software guide.
Setting Up an mDot
- Establish a serial connection to the mDot™
- Connect your PC to the DB9 serial connector on the UDK
- Open a terminal session using an application such as TeraTerm with baud rate 115,200
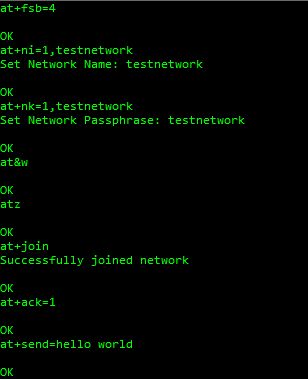
- Issue these commands with the same values you set for the gateway:
AT+FSB=value(915 NA only | value = frequencySubBand from your LoRa gateway)AT+NI=1,value(value = Network Name for your LoRa gateway)AT+NK=1,value(value = Network Passphrase for your LoRa gateway)AT&W(save settings)ATZ(restart)
- Join the network:
AT+JOIN - Send data with ACK requested:
AT+ACK=1AT+SEND=hello world
